Fig.1 Configuration
Another way of sharing files is to run a Samba server on your RISC OS machine. Doing this will allow you to access files on your RISC OS hard drive from Windows and Apple Mac machines.
Firstly you need to download and install a copy of Samba. This is available from riscossmbserver.sourceforge.net/ and should be downloaded in two parts. Firstly, download and install version 0.07a which is the full application. Then download and install version 0.08 which will upgrade 0.07a to the latest version, which is also 32-bit compatible and will run on the Iyonix.
Samba requires at least 8MB of memory in order to run, so can be relatively memory hungry. Load it by double-clicking on the !smbserver icon and it should appear on the left hand side of the iconbar. You should now configure it so that remote computers can access the local hard drive in the machine running Samba.
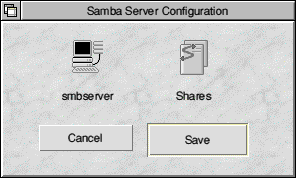
Click on the Samba icon and you should see the configuration window (fig.1)
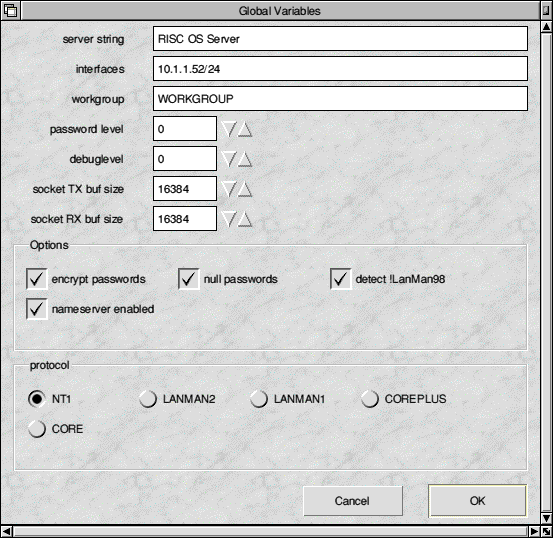
Now click on the smbserver icon in order to configure the main setup. You will be presented with the window shown in fig.2
Complete the relevant entries with the details for your specific setup:-
The server string should be the name you want to refer to your Samba server machine as. I just use something like RISC OS Server. This can be whatever you want.
interfaces should define the IP address and subnet mask of the machine running !Samba. The subnet mask is in /xx notation, with the most common setting being /24 which is equivalent to 255.255.255.0 (ie. 24 bits being masked).
workgroup should be the name of your work group which is where this machine will appear when you browse the Network neighbourhood on a PC. I would leave it called WORKGROUP for the time being.
Leave all the other settings as per the values shown in fig.2, making sure you've ticked the relevant options and protocols you want to support. Unless you want to customise your setup, it's probably best to use the same settings I've used in fig.2
Main configuration is now complete so you can click OK and continue configuring the actual things you want to share with other machines.
The examine here will show you how to setup three shared resources; a CD rom drive, a directory on your hard disc and a printer - so that a PC or Apple Mac can print to a printer connected to your RISC OS machine.
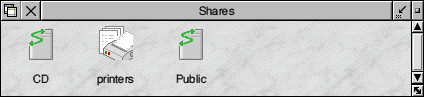
Click on Shares and you will see fig.3
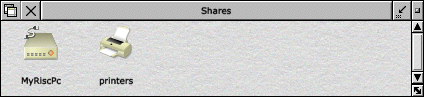
To share a directory on your RISC OS hard disc, start by editing the default share, so double-click on the MyRiscPc icon.
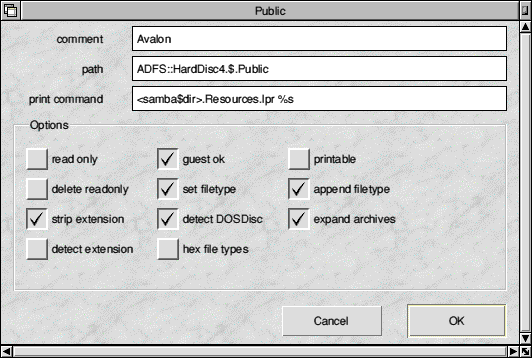
Set the top three values. comment can be what you want and is to identify or comment this particular shared directory. In the example, I've called it the same as the host name of RISC OS machine acting as Samba server.
The path should point to the directory you want to share, in this example the Public directory in the root of my hard disc. Drag a directory into the writable icon in order to set the path you require.
The print command can be left as the default value.
The Options are relatively self-explantory and can be set pretty much as in my example figure 4, shown here. strip extension, set filetype and append filetype will affect how PCs will interpret files stored on your RISC OS machine, so if you want a PC to be able to understand your file types (ie. let you double-click on files to load them) then I'd recommend setting them as shown here.
Click OK when you've set the options you require.
By default, your share is called MyRiscPc but I'd recommend renaming it to be something a bit more descriptive of the directory you're sharing. In my example, I've simply renamed it Public. You can do this by clicking on the icon to highlight it. Then click MENU and move right from Share 'MyRiscPc' then Rename and enter the new name you require.
Sharing a CD Rom is the same as sharing a directory. You need to add a new share by clicking MENU over the Shares window. Go across from New Share and enter a name for your new share. In this example, I've just called it CD (fig.3b).
The only real change you should make is to tick the read only option for CD Roms.
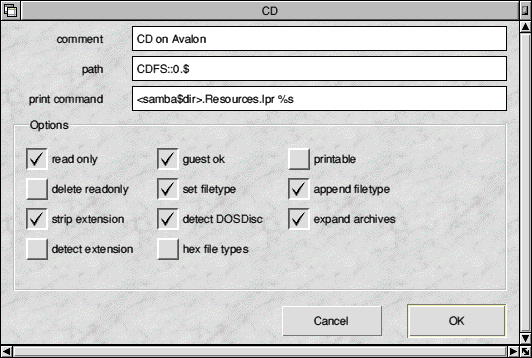
The only additional thing you may need to be aware of is that you can't drag the 'root' directory of a CD into the path icon, so you'll either need to type the filepath manually (see fig.5) or drag a file and then delete the filename back to the $ symbol (which represents the root directory).
Entering CDFS::0.$ should generically refer to the CD in drive 0 though.
Double-click on the printers icon to edit the printer share. This behaves pretty much like an ordinary file share except that the path should point to any directory which can be used to spool print files. Thus, it should be somewhere with enough storage space available to store the file being printed - which can be quite large. As you can see from fig.6, I've set it to the root directory on my hard disc.
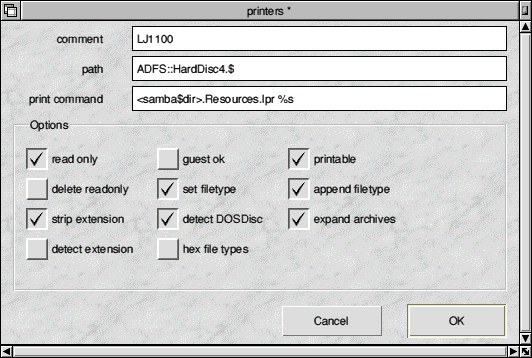
Tick the printable option and enter the name of the printer for the comment
Before you can print, you also need to ensure that !Printers is loaded and configured for the printer you want to allow printing from.
To print from your PC or Mac, simply add a new printer and browse the network neighbourhood for a new printer. It should automatically detect your shared printer in the WORKGROUP workgroup. Select it and configure as for any other Windows or Mac printer (ie. select the relevant printer name/model for the driver).
If all is well, you should now be able to print to the RISC OS machine from remote PCs and Macs.
|
Last edit: 10th Apr 2016 at 4:55pm (3479 days ago) |
|
| ||||||||||
|
| ||||||||||||||||||||