Using and Configuring the RISC OS Select Firewal
Users of RISC OS Select have the additional benefit of having a firewall built into RISC OS version 4.29 and above. However, as there is no GUI front-end at present, the only way of configuring it is by editing a script file within the RISC OS !Boot configuration.
This tutorial hopes to explain this for novices and newcomers.
Preamble
A firewall can have a number of meanings but essentially it's a way of protecting your computer from the outside world.
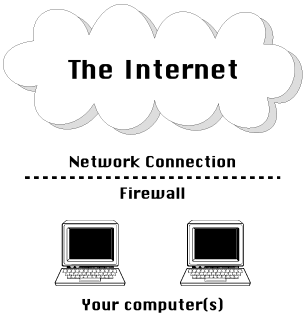
If you have a dialup connection with a normal modem, you will probably need some kind of firewall running on the machine connected to the modem. However, if you have broadband, you can buy routers with built-in firewalls, which give a first level barrier to the outside 'internet'.
Whilst you are on a network, whether it's a local one or part of the wider internet, your computer can communicate with other computers via a number of ports. These ports allow different applications on your computer to communicate without causing a clash of data.
For example, if you're fetching your email, your email software is probably using port 110 in order to connect to the remote mail server. Meanwhile, if you're fetching Usenet newsgroups your news fetcher is probably communicating via port 119. Additionally, if you connect to a remote site via FTP, your FTP client will generally use ports 20 and 21.
You don't really need to know what all the ports refer to, and indeed, a number of applications can be setup to communicate via different ports anyway. However, hackers can conceivably locate any open ports on your machine and try to communicate with your computer, or install viruses/trojans etc. This is why it's always wise to close any ports that you don't actually require for your personal working environment.
Setting up your Firewall
My policy when creating a firewall is to think maximum paranoia and to start off denying all access whatsoever - which effectively means you can't connect to anything, so won't be able to get email, browse the web or FTP anywhere.
Once you've effectively disabled everything you can then selectively enable all the services you require, one at a time. This should hopefully result in firewall rules with the maximum of protection to your network connections.
On RISC OS Select, double-click on !Boot which will load the main RISC OS control panel. Now click on the Network icon, to open the network choices. You should see a Firewall icon. Click on this and the computer will open a text file containing your default firewall rules. You will see some instructions at the beginning of the file. Do not edit this file for the time being.
The first thing to note is that all lines beginning with | are comments, so will be ignored. This is so that you can add your own notes and comments in the file if you want. If you scroll down the file you will see various InetFW commands that have been commented out. These are default examples, to give you an idea of how to use the InetFW command.
The first commented out line is;
IF "<Inet$Error>" = "" THEN InetFW -e Enable on
Uncommenting (removing the | at the beginning) will enable the firewall and, by default, disable all network access. Lets examine this line in more detail...
All lines in the firewall file should start with
IF "<Inet$Error>" = "" THEN
as this will ensure the relevant InetFW command is only executed if there have been no previous errors.
All firewall commands are controlled via InetFW which can have a number of parameters, depending on what you want to control.
You should always include the -e parameter before any other commands, as this will set the error status should anything go wrong. The IF ... THEN condition before subsequent commands will then prevent any more changes being made in the case of errors.
Adding Rules
Having un-commented the line above, the firewall will be active when you execute the file (or the machine reboots) and as the initial state is to deny everything, nothing will work now.
Having disabled everything, I would recommend re-enabling things that you need. This way you should end up with a bare minimum of 'rules', with everything else denied - hence giving maximum security.
Every line you add is essentially similar, but with different ports or services enabled. Thus once you've got the hang of the basic InetFW command, it's fairly easy to add and remove rules in order to customise your setup.
Common Ports
  21   FTP
  23   Telnet
  25   SMTP  (sending email)
  80   HTTP  (web browsing)
  37   Time
 110   POP3  (receiving email)
 113   Auth  (logging on and
              authenticating)
 143   IMAP4
 443   HTTPS (secure web pages)
|
|
The box on the right contains a list of common ports which I would recommend allowing through. This will ensure that you can still activate all the common internet services. The ones in black I would recommend as essential services, whereas the ones in grey are ones you may want to optionally enable, depending upon what you want to do on the computer.
There may well be other services that you need to enable (for instance if you want to use things like MSN Messenger) but for the purposes of this article I'm going to concentrate on the most popular ones initially.
Initial rules for local shares
If you have any other local RISC OS machines connected to your network you may want to allow ShareFS to continue working, so the first rule you need to add is to accept freeway/sharefs traffic.
Under construction - please check back soon!
Add a comment to this article
If you wish to add a comment to this article, please use the form below. Please note that by submitting comments using this form you are allowing all of the information submitted to be visible on this website. Your comment will be published immediately, so please proof-read before you add. Any comments deemed to be abusive or irrelevant to the topic of the article may be removed without warning.